 Purchased crinkle paint from VHT, painted the gauge panel and put it in a warm oven. Came out real nice.
  Purchased crinkle paint from VHT, painted the gauge panel and put it in a warm oven. Came out real nice.
 The nose has 4 fasteners on the the top back, but right now it just sits on the front and I don't see anyway it's fastened. I guess it's time to contact another Lola T192 owner.
 I removed the fiberglass and it looks to be OK to make a mould off it. Talking to a aircraft windshield Co. in Pa. they will let me know next week on cost.


 Every now and then it's a good idea to go a few steps ahead just to make sure there's clearances. Wanted to make sure the body didn't interfere with suspension and other parts recently added. Looks good.

 I'm getting better with these decals. The side panels have a large curve, so I had to level the car and then could level the decals. Also installed the insert for the side panels.


 The small panel that holds a pair of gauges needed a little touch up. There was no way
  I was going to remove it. It's riveted in. A whole lot of paper and tape and a small amount of paint made it better.
 The aluminium panels have nut inserts that are pressed in place. As luck goes, some are turning as I try to fastened them with the bolts. So I have ordered new replacements and should have them early next week.


 Starting to place some of the front suspension hardware on the car. Temporary put in place just to make sure it all bolts together properly.
 .
.
 Tuesday looked like a tornado past through. The snow stuck to the leaves and just broke everything. The power to the house went out at noon on Tuesday and return late Thursday evening. However the shop where I keep the car is behind the house and has a separate electric line. Tree snapped it and now I'm still waiting for electric back there.


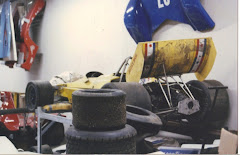
 It's starting to come together. But, as with everything else, it sure has taken a lot longer to accomplished.

 try, and fit perfect.
 Didn't think I would have anytime today for the car, but found about a hour and got the front brake lines done.
.jpg)


